- Security
- Privacy
- Performance
Are your Facebook settings adjusted for maximum privacy? Facebook holds the personal data of billions of monthly active users, and you should ensure the safety of your personal information while using the social media giant. We’ll teach you exactly how in our comprehensive Facebook privacy settings guide.

This Article Contains
This Article Contains
A brief introduction to Facebook privacy issues
Though the number of popular social media websites seems to be constantly on the rise, Facebook has remained the OG favorite since the platform went public in 2006. And with a reported 2.5 billion monthly active users at the end of 2019, its already incredibly large user base is actually still expanding. But, every “face” brings new facts to track, and as the platform grows, its privacy issues have followed suit.
Facebook has suffered numerous security breaches, including the infamous Cambridge Analytica scandal of 2018, in which the data of an estimated 87 million users was collected and mined without their consent.
Of course, Facebook is far from the only site with security flaws. In fact, any online platform that keeps consumer information can be breached. But though the cyber landscape may be teeming with scams, phishing attempts, cyberbullying and even identity theft, that doesn’t mean you should unplug your devices and go back to writing letters. It just means you need some digital literacy to help you stay safe. And that’s why it’s important to have strong privacy settings wherever you can, including on Facebook, Instagram, and elsewhere. Luckily, Facebook has plenty of privacy tools to help you minimize your online bread crumbs.
First things first: Set a strong password
Before you make a beeline straight to your Facebook settings page, we recommend first having a peek at your password.
Your password is your first line of digital defense, so it’s important to have a good one. Facebook recommends at least six characters, a symbol, and a mix of upper and lowercase letters. Even longer passwords are more secure, however.
Facebook also recommends that your password be unrelated to the one you use for your email, and to avoid including any obvious personal information like your birthday or phone number in it.
Suspect your password might not be up to snuff? Avast Password Generator can help you set a strong one.
Find your Facebook settings page
After creating your new hack-proof password, you’ll need to navigate over to your personal Facebook settings page in order to adjust your account settings. Here’s how to find the Facebook settings menu:
-
From any of your Facebook pages, click on the small triangle icon at the top right of the screen.
-
Next, find and select Settings from the dropdown menu.

-
This will take you to your General Account Settings page. From here, you’ll be able to select from the list on the left the specific security areas you wish to modify, from privacy settings to payment specs.
What are my current settings?
To start, let’s review your current Facebook privacy settings. If you’re new to Facebook or have never played around with personalization, your account most likely reflects the Facebook default privacy settings. Here’s how to view and revise these:
-
Select Privacy from the list on the top-left side of your General Account Settings screen.

-
From here, you’ll be able to see your existing privacy settings in full, from the posts you publish to the people you talk to. The best part? Each of these elements can be adjusted according to your personal preferences — just click on the edit button on the right.
-
Select Security and Login on the left to see more details about your current security settings, including dual-factor authentication, password changes, and notifications about unrecognized logins. We’ll walk you through the most important settings later in this article.

You can also use the special feature Facebook Security Checkup to review the most important settings. Launch the checkup through this link.

Click Start Security Checkup. Facebook will take you through a series of screens to help you assess several security factors. It’ll help you uncover and fix any security weaknesses, such as weak passwords.

How to change your Facebook privacy settings
Now that you know where to find your settings, let’s go through step-by-step instructions on how to change Facebook privacy settings. Read on for ten ways to improve your privacy on Facebook.
1. Control who can see your Facebook posts
Customizing who can see your Facebook posts is arguably one of the most important security measures to take. Though Facebook did change its default timeline post settings from “public” to “friends” in 2014, users still have the option to change their privacy settings for Facebook posts and photos. Here’s how to do this:
-
Open your General Account Settings page and select Privacy in the top left.
-
From there, you’ll be able to see who has access to what you post. If your privacy settings have never been changed, only your current Facebook friends will be able to see your posts.

-
Click Edit to customize your posting privacy settings. This can include:
-
-
Public: Everyone — even people without a Facebook account — has access to what you post.
-
Friends: Your Facebook friends can see your posts.
-
Friends Except: Individually eliminate viewers from your list of Facebook Friends.
-
Only Me: Your posts will be visible to you and no one else.
-
Specific Friends: Hand-pick people from your Friends list to see your posts.
-
Custom: Use this setting to include and exclude both groups and individuals when you share on Facebook.

-
You can also control from this screen who can see your past posts.
2. Hide your personal profile information
Now that you’ve set up your posting audience, let’s turn to your Overview. Until you’ve customized your About column, your Facebook profile privacy settings will automatically be set to public. Here’s how to select who can see your intro information:
-
Head to your personal Facebook profile by clicking your name in the top left of the Facebook homepage.
-
Under your Intro on the left side of the screen, click Edit Details.

-
Unselect any personal information you do not want publicly visible by toggling the gray bars at the left of each item.
-
Hit Save to update your preferences.
.png?width=649&name=img_06%20(1).png)
You can also tighten up your privacy settings on the rest of your Facebook profile information. Here’s how to change your profile privacy settings:
-
First, find the About section to the left of your timeline. Then select the category you’d like to change.
.png?width=649&name=img_07%20(2).png)
-
You can choose your audience for each item by using the small gray privacy icon on the right.

One notable exception here is your Facebook bio: that’s the snippet of text that shows up just below your name, and it’s always public. If you’re not comfortable with the entire internet being able to see this text, best exclude it from this section.

3. Revoke permissions for apps and games
If you’re like us, you’ve probably indulged in an online game or two that posted your scores on Facebook. If you’ve never gone back and removed, say, Farmville’s access from your Facebook account, the game can still see and share your data — even if you’re no longer playing it. Here’s how to remove permissions for apps and games on Facebook:
-
Select Apps and Websites from the list on the left of your General Account Settings screen.
-
Get rid of any games you’re no longer using by checking the little white box at the far right of the listing and then clicking Remove.

You can also customize how you share your data with the games and apps that you still do use. To do this:
-
Click the View and Edit link on the right side of each game you wish to keep.
-
From here, you can deselect any data you no longer wish to share, including your Facebook friends list and email address, and choose whether or not the app is allowed to send you notifications.

4. Turn off facial recognition
The face recognition software on Facebook analyzes your photos and videos to create what’s called your facial “template.” When you turn your facial recognition settings on, Facebook can then compare this template to other images to determine whether you might appear elsewhere. To disable the face recognition setting:
-
Select Face Recognition Settings from the list on the left of your General Account Settings screen.
-
Click Edit to review your facial recognition settings. Use the dropdown bar to make your selection.

5. Hide posts from your timeline
Did an unflattering tag turn up on your timeline? Fear not! Though there’s no standard “sharing on Facebook” privacy setting, you can tweak your timeline privacy as you see fit. To hide posts from your Facebook timeline:
-
Find the post you’d like to eliminate on your timeline, then click on the three-dot icon in the top-right corner of the post.
-
From the menu, select Hide from timeline.

Once you hide a post, it will no longer be visible on your timeline. But, keep in mind that if other people have already shared it, it will still be accessible on their timelines, and elsewhere on Facebook.
6. Limit who can send you Facebook friend requests
If you’ve ever gotten a Facebook friend request from an absolute stranger, you’re in good company. Here’s how to add an element of security to your Facebook friend requests:
-
Select Privacy from the top of the list on the left of your General Account Settings screen.
-
Hover over the Who Can Send You Friend Requests? option and click Edit.
-
From the dropdown menu, you can select whether you’d like to keep your request pool open to everyone or limit your requests to only friends of your Facebook friends.

7. Turn off location services
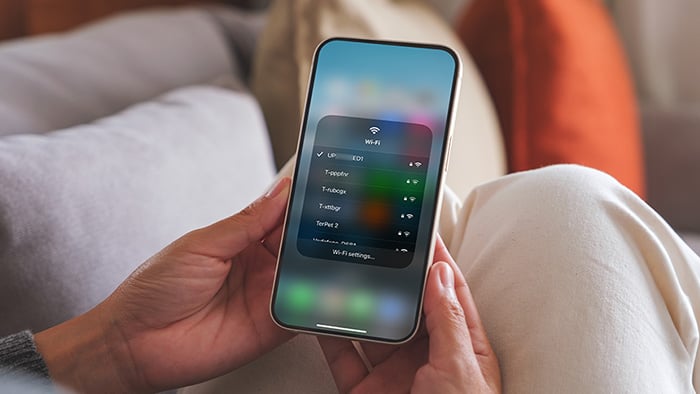
Location Services is a setting Facebook offers for both iOS and Android mobile devices that allows Facebook to provide users with live location-based information, such as locating nearby Wi-Fi or allowing you to “check in” at a restaurant. But, this also means that Facebook knows exactly where you are as long as Location Services is on.
Location Services can be found via the Privacy settings on your mobile device.
 Once there, you can choose to enable Location Services Always, only While Using the Facebook app, or our personal favorite, Never.

Facebook’s Location History feature, however, is another entity entirely. If you’ve enabled Location History for your account, Facebook can compile a log of the precise locations you’ve been while using your mobile device. Here’s how to turn off Location History:
-
Select Location Settings from the list on the left of your General Account Settings screen.
-
From here, you can select from the dropdown menu whether you’d like to turn your mobile device’s Location History on or off.

8. Remove your Facebook profile from Google results
If “incognito” is the name of your game, Facebook has a handful of useful features to help make your presence a little less obvious. One of these is the ability to remove your Facebook profile from appearing in Google, or other search engines. To do this:
-
Select Privacy from top of the list on the left side of your General Account Settings page.
-
Scroll to the very last section labeled Do you want search engines outside of Facebook to link to your profile?
-
Select Edit to review your options and make your selection.

9. Stop being tagged in Facebook posts
If you’ve ever been tagged in an unflattering photo, you’ll appreciate the ability to control your Facebook tagging settings. You can make it so that you need to approve any tags before a photo or post appears on your timeline. To do this:
-
Choose Timeline and Tagging from the top of the list on the left side of your General Account Settings screen.

-
Scroll down to the last section labeled Review. From here, you can elect to look over both posts and tags that other people have added before they go public on your page.
-
Click Edit on the far right of the page to enable this setting. Now you’ve got the power!
-
Review your settings and finalize your choices.

10. Block certain users
If you’re a seasoned social media user, you’ve almost certainly come across someone you don’t want to be connected with. Knowing how to limit what certain friends see on Facebook is a crucial step in staying safe. You can choose to restrict or block people. Here’s how to block specific Facebook users:
-
Select Blocking from the top of the list on the left side of your General Account Settings screen.
-
From here, scroll down to the Block Users section. Use the search bar to find specific Facebook accounts using either a name or an associated email address.

-
Once you’ve found who you’re looking for, simply hit the blue Block button to disable any and all communication between the two of you on Facebook. If they try to search for you, it’ll be like you don’t even exist.
Protect your privacy beyond Facebook
While it’s fairly easy to protect your privacy on Facebook if you follow the steps outlined above, Facebook is just one website. You can easily be spied on across the rest of the internet by advertisers, governments, and your Internet Service Provider. And these players can trade or sell your data to third parties or even raise prices on items you’ve been searching for.
The best way to ensure comprehensive privacy is to use a Virtual Private Network. A VPN such as Avast SecureLine VPN encrypts your entire internet connection, making you untraceable online and keeping your private matters private. Whether you’re catching up with friends on social media, doing some online shopping, or checking your bank account or investments online, a VPN delivers essential digital privacy.
What customers say
More Privacy Articles

How to Find Hidden Apps on Android
How to turn off Meta AI
SSID: What It Means and How to Find Yours

How to Block Someone on TikTok (a Step-by-Step Guide)
How to Delete an Apple ID Account

How to Delete Your BeReal Account in Three Easy Steps
How to Delete Your Tinder Account

What Is a Digital Footprint and How Does It Work?

How to Block Your Phone From Being Tracked

Your Guide to Deactivating and Deleting Facebook Messenger
What Is Doxxing, Is Doxxing Illegal, and How Do You Prevent or Report It?
How to Hide Apps on an Android Phone
Privacy Tips
Privacy
Anna Faller
7-05-2020